注意:Maven自动构建和自动部署的区别在于,构建只是编译代码阶段,而部署是一整套代码获取到编译再到打包发布的完整流程。
提示:其实本文提到的场景可能有一些矛盾,但只是出于演示效果,主要目的是实现Maven中利用POM进行代码获取、更新、提交、编译再到部署的过程。
一、场景
在项目开发中,通常开发阶段包含下面几个步骤:
- 将所有进行的项目的代码提交到SVN/Git或者代码库中并打上标签。
- 从SVN/Git下载完整的源代码。
- 构建应用。
- 存储构建输出的WAR或者EAR文件到一个常用的网络位置下。
- 从网络上获取文件并且部署文件到生产站点上。
- 及时更新文档并且更新应用的版本号。
二、问题说明
通常情况下上面提到开发过程中会涉及到多群人。一个团队可能负责提交代码,另一个团队负责构建等等。很有可能由于涉及的人为操作和多团队环境的原因,任意步骤都可能出错。比如,较早的构建版本没有在网络计算机上被替换,然后部署团队又重新部署了较早的构建版本。
三、解决方法
通过下面的方法自动化部署:
- 使用SubVersion/Git,源码仓库来管理源代码
- 使用Maven构建和发布项目
- 使用远程仓库管理软件(Jfrog或者Nexus) 来管理项目二进制文件。
四、实现步骤
1、使用SCM实现从SVN上获取代码
说明:
- 这里演示的效果为第一次从SVN获取下来的代码(也就是说本机要安装SVN客户端),然后在pom.xml文件中加入SCM支持,使其能通过Maven的命令去实现代码的提交等操作,即不用SVN客户端的参与了。
- 如果想要实现第一次获取代码不用SVN客户端的参与,可以这样操作,先新建pom.xml文件,并配置SCM的节点支持SVN,然后使用SCM的checkout命令去获取一次代码,也就是用Maven去第一次从SVN中checkout代码,然后在pom.xml文件中加入SCM支持,使其能通过Maven的命令去实现代码的提交等操作。(也就是将第①步中用SVN客户端获取代码的步骤省略了,后面都和第①步的一样)
- 假设第一次已经从SVN获取了代码,然后按如下方式修改项目中的pom.xml文件:
<project xmlns="http://maven.apache.org/POM/4.0.0" xmlns:xsi="http://www.w3.org/2001/XMLSchema-instance"
         xsi:schemaLocation="http://maven.apache.org/POM/4.0.0 http://maven.apache.org/maven-v4_0_0.xsd">
    <modelVersion>4.0.0</modelVersion>
    <groupId>com.jsoft.test</groupId>
    <artifactId>bus-core-api</artifactId>
    <packaging>jar</packaging>
    <version>1.0-SNAPSHOT</version>
    <name>bus-core-api</name>
    <url>http://maven.apache.org</url>
    <scm>
        <developerConnection>scm:svn:https://jim:1@127.0.0.1:5443/svn/Test/trunk/bus-core-api/</developerConnection>
    </scm>
    <dependencies>
        <dependency>
            <groupId>junit</groupId>
            <artifactId>junit</artifactId>
            <version>3.8.1</version>
            <scope>test</scope>
        </dependency>
    </dependencies>
    <build>
        <plugins>
            <plugin>
                <groupId>org.apache.maven.plugins</groupId>
                <artifactId>maven-scm-plugin</artifactId>
                <version>1.9.5</version>
                <configuration>
                    <connectionType>developerConnection</connectionType>
                </configuration>
            </plugin>
        </plugins>
    </build>
</project>
提示:通过<connection>配置SVN的地址,其中地址上包含了账号和密码,然后再添加maven-scm-plugin插件,并配置<connectionType>对应上面的节点,这里配置的devloperConnection是跟<devloperConnection>对应的。<connection>,<developerConnection>都是连接字符串,其后者是具有write权限的SCM连接。
SCM还有很多配置的细节,上面精简的是为了演示基本功能基本够用了,如要更深入的了解,可以参考以下网站:
- maven-scm-plugin:http://maven.apache.org/scm/maven-scm-plugin/index.html
- 插件使用:http://maven.apache.org/scm/maven-scm-plugin/usage.html
<scm>节点完整属性配置:http://maven.apache.org/pom.html#SCM- 插件配置源代码管理系统的支持(SVN/Git等):http://maven.apache.org/scm/scms-overview.html
- maven-scm-plugin命令行:http://maven.apache.org/scm/maven-scm-plugin/plugin-info.html
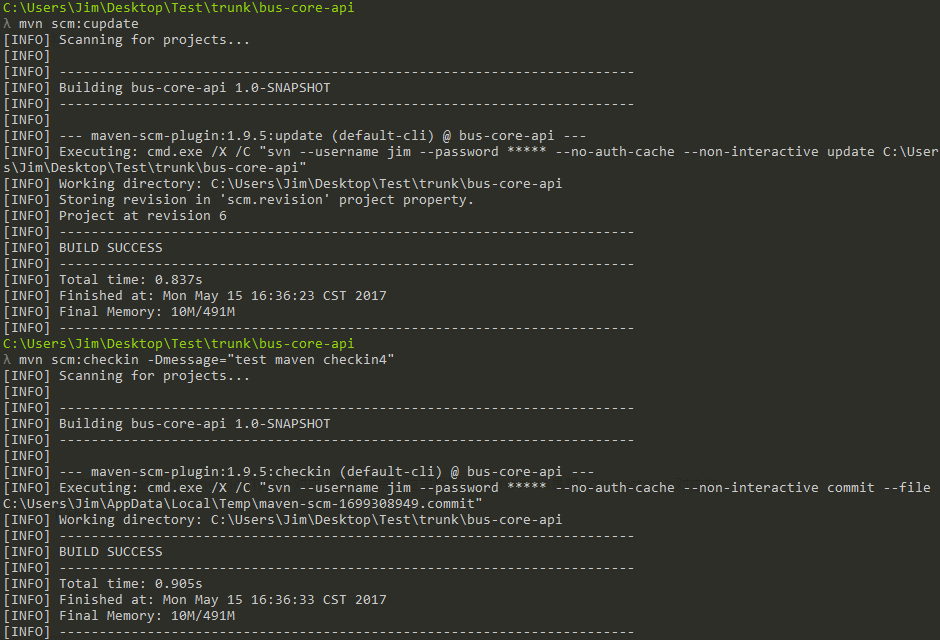
配置好之后可以在命令行上运行进行测试,比如提交代码和更新代码的命令如下:
mvn scm:checkin -Dmessage="代码提交日志" #代码提交
mvn scm:update #代码更新
 接下来将使用maven-release-plugin进行版本的发布、回滚等操作,maven-release-plugin的用途是帮助自动化项目版本发布,它依赖于POM中的SCM信息。修改项目的pom.xml文件如下:
<project xmlns="http://maven.apache.org/POM/4.0.0" xmlns:xsi="http://www.w3.org/2001/XMLSchema-instance"
  xsi:schemaLocation="http://maven.apache.org/POM/4.0.0 http://maven.apache.org/maven-v4_0_0.xsd">
  <modelVersion>4.0.0</modelVersion>
  <groupId>com.jsoft.test</groupId>
  <artifactId>bus-core-api</artifactId>
  <packaging>jar</packaging>
  <version>1.0-SNAPSHOT</version>
  <name>bus-core-api</name>
  <url>http://maven.apache.org</url>
  <scm>
    <developerConnection>scm:svn:https://jim:1@127.0.0.1:5443/svn/Test/trunk/bus-core-api/</developerConnection>
  </scm>
  <dependencies>
    <dependency>
      <groupId>junit</groupId>
      <artifactId>junit</artifactId>
      <version>3.8.1</version>
      <scope>test</scope>
    </dependency>
  </dependencies>
  <build>
    <plugins>
      <plugin>
        <groupId>org.apache.maven.plugins</groupId>
        <artifactId>maven-scm-plugin</artifactId>
        <version>1.9.5</version>
        <configuration>
          <connectionType>developerConnection</connectionType>
        </configuration>
      </plugin>
      <plugin>
        <groupId>org.apache.maven.plugins</groupId>
        <artifactId>maven-release-plugin</artifactId>
        <version>2.5.3</version>
        <configuration>
          <username>jim</username>
          <password>1</password>
          <tagBase>https://127.0.0.1:5443/svn/Test/tags</tagBase>
          <releaseProfiles>release</releaseProfiles>
       </configuration>
      </plugin>
    </plugins>
  </build>
</project>
注意:在使用maven-release-plugin时,如果你是一个不标准的SVN目录(没有trunk/tags/branches)的,那么必须配置
通过以下命令行测试:
mvn release:clean #发布前的清理
mvn release:prepare #发布版本
mvn release:rollback #回滚版本
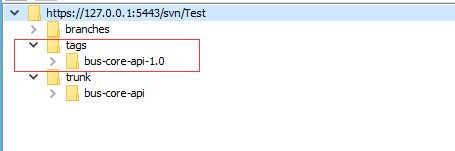
注意:在运行发布版本时,如果代码修改过没有迁入是不能通过的。当发布好版本之后会在上面定义的tag目录中有一份代码,如下所示:
 maven-release-plugin插件还有很多命令,比如创建分支等(当然这一切都可以使用SVN客户端操作,但是人为操作在大型多模块项目来说就显得过于庞大,使用插件的方式能节省很多人为操作的时间等),可以参考以下网站:
- maven-release-plugin:http://maven.apache.org/maven-release/maven-release-plugin/index.html
- 使用方法:http://maven.apache.org/maven-release/maven-release-plugin/usage.html
- 命令行参数(同时也是配置节点的说明):http://maven.apache.org/maven-release/maven-release-plugin/plugin-info.html
接下来是配置提交到Nexus的私有仓库,修改pom.xml如下:
<project xmlns="http://maven.apache.org/POM/4.0.0" xmlns:xsi="http://www.w3.org/2001/XMLSchema-instance" xsi:schemaLocation="http://maven.apache.org/POM/4.0.0 http://maven.apache.org/maven-v4_0_0.xsd">
  <modelVersion>4.0.0</modelVersion>
  <groupId>com.jsoft.test</groupId>
  <artifactId>bus-core-api</artifactId>
  <packaging>jar</packaging>
  <version>1.0-SNAPSHOT</version>
  <name>bus-core-api</name>
  <url>http://maven.apache.org</url>
  <distributionManagement>
    <repository>
        <id>oss</id>
        <url>http://127.0.0.1:8081/repository/maven-releases/</url>
    </repository>
    <snapshotRepository>
        <id>oss</id>
        <url>http://127.0.0.1:8081/repository/maven-snapshots/</url>
    </snapshotRepository>
  </distributionManagement>
  <scm>
    <developerConnection>scm:svn:https://jim:1@127.0.0.1:5443/svn/Test/trunk/bus-core-api/</developerConnection>
  </scm>
  <dependencies>
    <dependency>
      <groupId>junit</groupId>
      <artifactId>junit</artifactId>
      <version>3.8.1</version>
      <scope>test</scope>
    </dependency>
  </dependencies>
  <build>
    <plugins>
      <plugin>
        <groupId>org.apache.maven.plugins</groupId>
        <artifactId>maven-scm-plugin</artifactId>
        <version>1.9.5</version>
        <configuration>
          <connectionType>developerConnection</connectionType>
        </configuration>
      </plugin>
      <plugin>
        <groupId>org.apache.maven.plugins</groupId>
        <artifactId>maven-release-plugin</artifactId>
        <version>2.5.3</version>
        <configuration>
          <username>jim</username>
          <password>1</password>
          <tagBase>https://127.0.0.1:5443/svn/Test/tags</tagBase>
          <releaseProfiles>release</releaseProfiles>
       </configuration>
      </plugin>
    </plugins>
  </build>
</project>
其中上面的id对应%M2_HOME%\conf\settings.xml的
<servers>
    ...
    <server>
        <id>oss</id>
        <username>admin</username>
        <password>admin123</password>
    </server>
    ...
</servers>
运行以下命令进行发布
mvn release:clean release:prepare release:perform
注意:运行命令前一定要把所有代码都迁入,不然会报错。当发布完成后,id会自动更新,并且是存放在Release库中。
测试工程:https://github.com/easonjim/5_java_example/tree/master/maventest/test6/bus-core-api
本文由 创作,采用 知识共享署名4.0 国际许可协议进行许可。本站文章除注明转载/出处外,均为本站原创或翻译,转载前请务必署名。最后编辑时间为: 2020/05/15 08:31