使用node.js搭建一个可运行的、热部署的前端项目
目标:
-
(1):使用node.js及其插件,搭建一个可运行的前端项目;
-
(2):实现自动部署,热部署;
-
(3):使用代理获取后台数据,实现前后端完全分离;
工具:
- webstorm
- Chrome浏览器
实现:
(1):安装webstorm,网上大把下载。(本人用的2017版本)
(2):安装node.js,度娘相当强。(本人使用8.1.1)
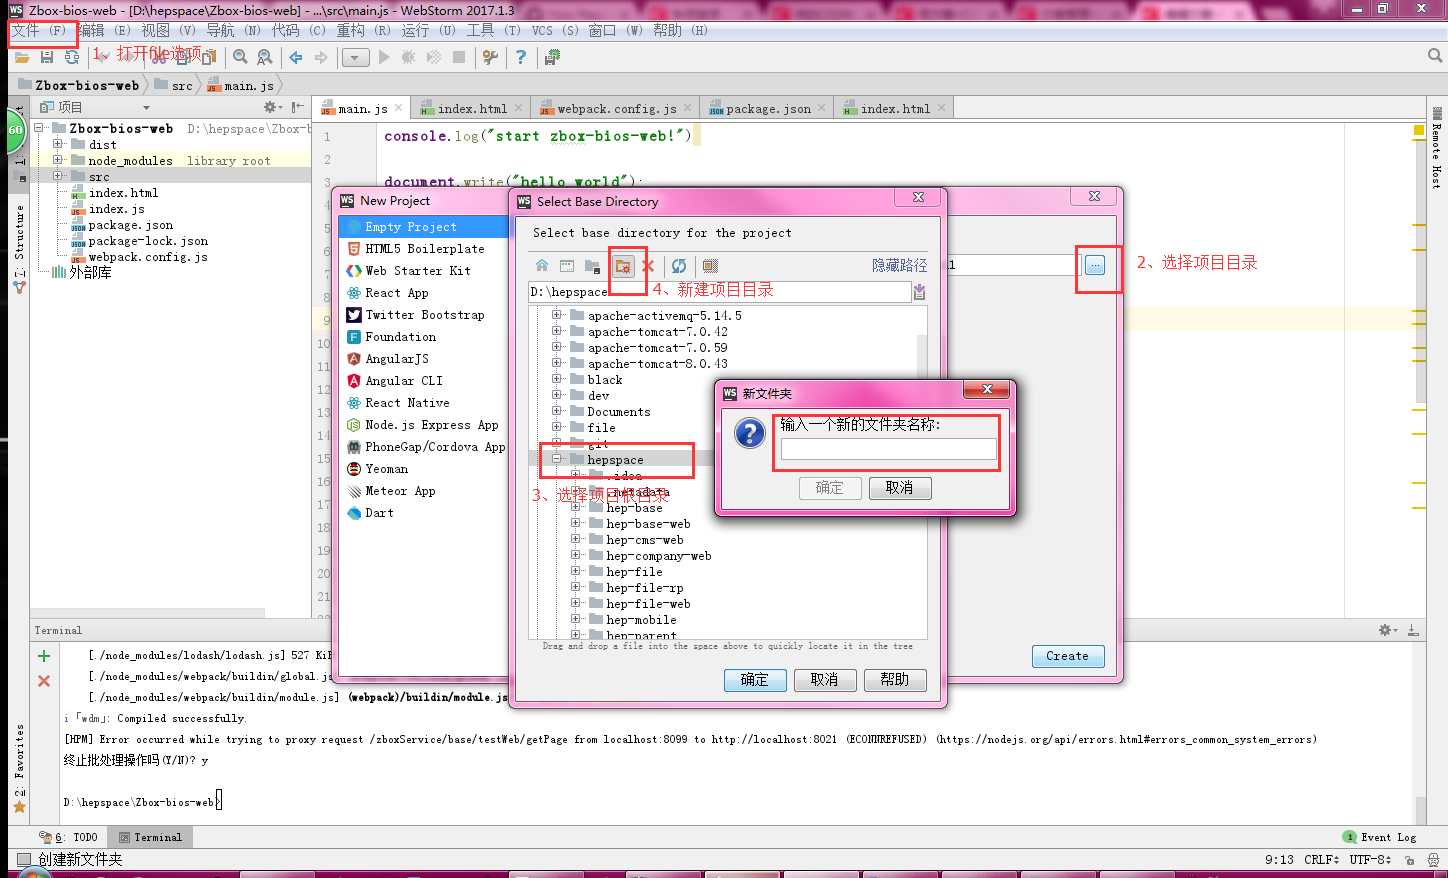
(3):使用webstorm新建一个demo项目。如图:
 ###(4):初始化项目。
打开webstorm左下角的Terminal。运行npm命令对项目进行初始化。初始化完成之后,会生成一个项目文件package.json。
###(4):初始化项目。
打开webstorm左下角的Terminal。运行npm命令对项目进行初始化。初始化完成之后,会生成一个项目文件package.json。
npm init
初始化完成后在项目根目录下新建一个html文件和一个js文件作为入口文件,名称自定义。
(5):安装webpack。
npm install --save-dev webpack
等待安装完成后,在项目根目录下新建一个 webpack.config.js。该js为webpack配置文件
var path = require('path');
var webpack = require('webpack');
module.exports = {
    // 入口js文件即可
    entry: './index.js',
    output: {
        // 输出目录的配置,模板、样式、脚本、图片等资源的路径配置都相对于它
        path: path.join(__dirname, 'dist'),
        // 输出js名称
        filename: "bundle.js"
    },
    module: {
        rules: []
    }
};
(6):安装服务器插件。
npm install live-server -g
npm install webpack-dev-server --save-dev
npm install webpack-cli -D
安装服务器插件完成之后需要修改 webpack.config.js配置文件。新增server配置即可
module.exports = {
    // ……
    devServer: {
        historyApiFallback: true,
        //注意:不写hot: true,否则浏览器无法自动更新;也不要写colors:true,progress:true等,webpack2.x已不支持这些
        inline: true,
    },
    plugins:[
        // ……
        new webpack.HotModuleReplacementPlugin()
    ]
    // ……
};
修改后的 webpack.config.js
(7):配置启动命令。
修改 package.json ,新增start命令。
{
    "name": "demo",
    "version": "1.0.0",
    "description": "",
    "main": "index.js",
    "scripts": {
        "test": "echo "Error: no test specified" && exit 1",
        "start": "webpack-dev-server --inline"
    },
    "keywords": [
        "demo"
    ],
    "author": "zhuhao",
    "license": "ISC",
    "devDependencies": {
        "webpack": "^4.5.0",
        "webpack-cli": "^2.0.14",
        "webpack-dev-server": "^3.1.3"
    }
}
现在我们执行 npm start 等待项目启动。
npm start
打开浏览器。http://localhost:8080/
(8):配置 npm start 项目时,自动打包自动打开浏览器。
配置自动打开浏览器的配置:在 package.json 内scripts内start 添加代码
// Windows
"start":"start http://localhost:8081"
// Mac
"start":"open http://localhost:8081"
// Linux
"start":"xdg-open http://localhost:8081"
我是windows,则添加Windows的配置; 配置自动打包:在start命令中添加 webpack即可;修改后的package.json:
{
    "name": "demo",
    "version": "1.0.0",
    "description": "",
    "main": "index.js",
    "scripts": {
        "test": "echo "Error: no test specified" && exit 1",
        "start": "webpack && start http://localhost:8080 && webpack-dev-server --inline"
    },
    "keywords": [
        "demo"
    ],
    "author": "zhuhao",
    "license": "ISC",
    "devDependencies": {
        "webpack": "^4.5.0",
        "webpack-cli": "^2.0.14",
        "webpack-dev-server": "^3.1.3"
    }
}
(9):整合打包,并实现热部署,将入口index.js文件和index.html文件打包到一起。开始的时候index.html可以不用引用index.js
安装插件 html-webpack-plugin
npm install html-webpack-plugin --save-dev
修改webpack.config.js文件配置
var HtmlWebpackPlugin = require('html-webpack-plugin');
plugins: [
    // *******
    new HtmlWebpackPlugin({
        template: './index.html'
    })
    // ******
]
修改后的webpack.config.js
var path = require('path');
var webpack = require('webpack');
var HtmlWebpackPlugin = require('html-webpack-plugin');
module.exports = {
    entry: './index.js',
    // 解决打包报错问题
    mode: 'development',
    output: {
        //输出目录的配置,模板、样式、脚本、图片等资源的路径配置都相对于它
        path: path.join(__dirname, 'dist'),
        filename: "bundle.js"
    },
    devServer: {
        historyApiFallback: true,
        // 注意:不写hot: true,否则浏览器无法自动更新;也不要写colors:true,progress:true等,webpack2.x已不支持这些
        inline: true,
    },
    plugins: [
        new HtmlWebpackPlugin({
            template: './index.html'
        }),
        new webpack.HotModuleReplacementPlugin()
    ],
    module: {
        rules: []
    }
};
这样配置之后,在我们修改js或者html之后 页面会自动刷新,并更新为最新代码
(10):配置代理服务器,获取后台数据;
修改webpack.config.js文件配置
devServer: {
    // ***********************
    proxy: {
        // 请求到 '/device' 下 的请求都会被代理到 target: http://debug.xxx.com 中
        '/device/*': {
            target: 'http://debug.xxx.com',
            secure: false, // 接受 运行在 https 上的服务
            changeOrigin: true
        }
    }
}
例:我的配置是
proxy: {
    // 请求到 '/zboxService' 下 的请求都会被代理到 target: http://localhost:8021 中
    '/zboxService/*': {
        target: 'http://localhost:8021',
        secure: false, // 接受 运行在 https 上的服务
        changeOrigin: true
    }
},
本地跑后台项目即可,就不存在跨域的问题了;
ajax例子:
$.ajax({
    // 会自动代理到 http://localhost:8021/zboxService/base/testWeb/getPage
    url:"/zboxService/base/testWeb/getPage",
    dataType:"json",
    success:function (data) {
        console.log(data);
    }
})
(11):其他,关于配置前端访问端口。
修改 webpack.config.js中的 devServer即可
var path = require('path');
var webpack = require('webpack');
var HtmlWebpackPlugin = require('html-webpack-plugin');
module.exports = {
    entry: './index.js',
    mode: 'development',
    output: {
        // 输出目录的配置,模板、样式、脚本、图片等资源的路径配置都相对于它
        path: path.join(__dirname, 'dist'),
        filename: "bundle.js"
    },
    devServer: {
        // 端口: 当然这里修改了,则其他地方也得修改,package.json中的start参数
        port: 8099,
        historyApiFallback: true,
        // 注意:不写hot: true,否则浏览器无法自动更新;也不要写colors:true,progress:true等,webpack2.x已不支持这些
        inline: true,
    },
    plugins: [
        new HtmlWebpackPlugin({
            template: './index.html'
        }),
        new webpack.HotModuleReplacementPlugin()
    ],
    module: {
        rules: []
    }
};
项目下载 https://github.com/zhuhao18/Zbox-bios-web
本文由 创作,采用 知识共享署名4.0 国际许可协议进行许可。本站文章除注明转载/出处外,均为本站原创或翻译,转载前请务必署名。最后编辑时间为: 2021/05/11 03:28