依赖
要进行单元测试,需要引入依赖:
<dependency>
   <groupId>org.springframework.boot</groupId>
   <artifactId>spring-boot-starter-test</artifactId>
   <scope>test</scope>
</dependency>
待测试类
设有一个Controller,其路径为src/main/java/com/template/controller/HelloWorldController:
package com.template.controller;

import com.alibaba.fastjson.JSON;
import com.alibaba.fastjson.JSONObject;
import org.springframework.web.bind.annotation.RequestMapping;
import org.springframework.web.bind.annotation.RestController;

@RestController
public class HelloWorldController {

    @RequestMapping("/HelloWorld")
    public JSONObject index() {
        JSONObject r = new JSONObject();
        ((JSONObject) r).put("name", "tesla");
        ((JSONObject) r).put("age", 88);
        return r;
    }
}
基本单元测试
- 现在要对该
Controller编写单元测试,需要在路径src/test/java/com/template下,创建对应的controller文件夹,并在其下添加HelloWorldControllerTest.java。
package com.template.controller;

import com.alibaba.fastjson.JSON;
import com.template.TemplateApplication;
import org.junit.Before;
import org.junit.Test;
import org.junit.runner.RunWith;
import org.springframework.beans.factory.annotation.Autowired;
import org.springframework.boot.test.autoconfigure.web.reactive.AutoConfigureWebTestClient;
import org.springframework.boot.test.context.SpringBootTest;
import org.springframework.test.context.junit4.SpringRunner;

@RunWith(SpringRunner.class)
@SpringBootTest
public class HelloWorldControllerTest {
    @Autowired
    HelloWorldController hwController;

    // 初始化
    @Before
    public void setUp() throws Exception {
        System.out.println("执行初始化");
    }

    // 测试
    @Test
    public void test() throws Exception {
        JSONObject r = hwController.index();
        System.out.println(r.toJSONString());
    }
}
备注:
- 类名为
HelloWorldControllerTest,也就是HelloWorldController的类名后添加一个Test,这不是强制的,可以看作一种习惯。 - 类名前要添加
@RunWith(SpringRunner.class)和@SpringBootTest。 - 使用
@Autowired来引入HelloWorldController变量。这样就可以在成员函数中调用HelloWorldController的各个函数。 @Before注解用于初始化。因为测试之前很可能需要设定一些变量等,可以在该函数里执行。测试函数运行时,会先执行@Before注解函数。- 测试函数使用@Test注解。在该函数中调用
HelloWorldController变量来执行某些操作即可。
- 在测试函数
test()函数上点右键,选择Run或者Debug,即可看到控制台打印的结果。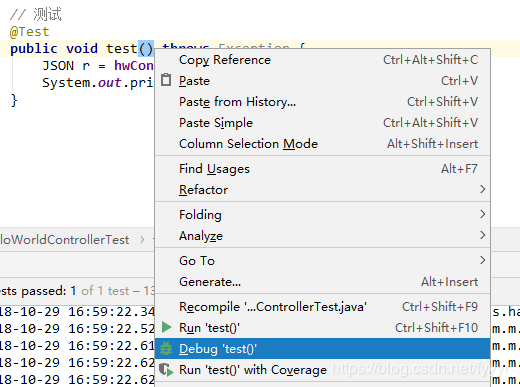 通常,使用System.out.println()将测试需要查看的值打印出来,或者直接加断点,就已经可以满足测试需求了。然而为了更高效的测试,还可以使用两种方式:
- Assert.assertThat()断言。
- Mock。
Assert.assertThat()断言
格式:
Assert.assertThat(需测试对象, 测试条件)
即传入两个参数,一个是需要测试的对象,另一个是测试的条件。
例如:
import com.alibaba.fastjson.JSON;
import com.alibaba.fastjson.JSONObject;
import com.template.TemplateApplication;
import org.junit.Assert;
import org.junit.Before;
import org.junit.Test;
import org.junit.runner.RunWith;
import org.springframework.beans.factory.annotation.Autowired;
import org.springframework.boot.test.autoconfigure.web.reactive.AutoConfigureWebTestClient;
import org.springframework.boot.test.context.SpringBootTest;
import org.springframework.test.context.junit4.SpringRunner;

import static org.hamcrest.core.Is.is;

@RunWith(SpringRunner.class)
@SpringBootTest
public class HelloWorldControllerTest {
    @Autowired
    HelloWorldController hwController;

    // 初始化
    @Before
    public void setUp() throws Exception {
        System.out.println("执行初始化");
    }

    // 测试
    @Test
    public void test() throws Exception {
        JSONObject r = hwController.index();
        Assert.assertThat(r.getString("name"),is("tesla"));
    }
}
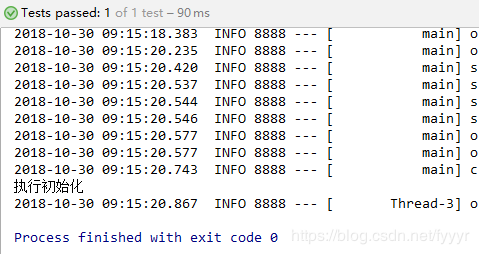
若测试通过,会看到提示:
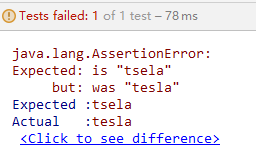
 若测试没有通过:
这里判断条件使用了is()函数,判断条件所用的函数非常多:
- assertThat( testedNumber, allOf( greaterThan(8), lessThan(16) ) );
- allOf:传入多个条件,所有条件必须都成立测试才通过,相当于“与”(&&)。
- assertThat( testedNumber, anyOf( greaterThan(16), lessThan(8) ) );
- anyOf:传入多个条件,所有条件只要有一个成立则测试通过,相当于“或”(||)。
- assertThat( testedNumber, anything() );
- anything:传入一个String或者不传,无论传入的是什么,永远为true。
- assertThat( testedString, is( "developerWorks" ) );
- is:若前面待测的object等于后面给出的object,则测试通过。
- assertThat( testedString, not( "developerWorks" ) );
- not:与is匹配符相反,若前面待测的object不等于后面给出的object,则测试通过。
- 除此之外还有很多其他用于字符串,数值,iterator,map等的判断条件。
Mock
对一个Controller进行测试,通常需要:启动服务→打开浏览器/测试工具→发出请求→收到Controller的返回数据并打印。而且测试一个Controller,必须将整个工程全部加载。Mock可以创建一个虚拟的对象来代替那些不易构造或不易获取的对象,通常就是request对象。并且可以只测试当前Controller,且不需要启动Tomcat等服务。相比于常规的调试,Mock测试更加便捷。Mock为Spring自带,不需要额外引入依赖库。
例如:
import org.junit.Before;
import org.junit.Test;
import org.junit.runner.RunWith;
import org.springframework.boot.test.context.SpringBootTest;
import org.springframework.http.MediaType;
import org.springframework.test.context.junit4.SpringRunner;
import org.springframework.test.web.servlet.MockMvc;
import org.springframework.test.web.servlet.RequestBuilder;
import org.springframework.test.web.servlet.ResultActions;
import org.springframework.test.web.servlet.request.MockMvcRequestBuilders;
import org.springframework.test.web.servlet.result.MockMvcResultHandlers;
import org.springframework.test.web.servlet.result.MockMvcResultMatchers;
import org.springframework.test.web.servlet.setup.MockMvcBuilders;

@RunWith(SpringRunner.class)
@SpringBootTest
public class HelloWorldControllerTest {
    private MockMvc mockMvc;
    @Autowired
    private HelloWorldController helloWorldController;

    // 初始化
    @Before
    public void setUp() throws Exception {
        System.out.println("执行初始化");
        mockMvc = MockMvcBuilders.standaloneSetup(helloWorldController
).build();
    }

    // 测试
    @Test
    public void test() throws Exception {
        RequestBuilder request = MockMvcRequestBuilders.get("/HelloWorld")
                .contentType(MediaType.APPLICATION_JSON)    //发送所用的数据格式
                .accept(MediaType.APPLICATION_JSON) //接收所使用的数据格式
                .param("id","201801");  //附加参数

        // 执行请求
        ResultActions result = mockMvc.perform(request);
        // 分析结果
        result.andExpect(MockMvcResultMatchers.status().isOk()) // 执行状态
                .andExpect(MockMvcResultMatchers.jsonPath("name").value("Tesla")) // 期望值
                .andDo(MockMvcResultHandlers.print()) // 打印
                .andReturn();   // 返回
    }
}
如上,Mock的使用过程为:
- 定义MockMvc变量和Controller类变量:
private MockMvc mockMvc;
@Autowired
private HelloWorldController helloWorldController;
- 在修饰的初始化函数中,创建MockMvc对象:
@Before
public void setUp() throws Exception {
    System.out.println("执行初始化");
    mockMvc = MockMvcBuilders.standaloneSetup(helloWorldController).build();
}
创建MockMvc对象时,需要传入1中定义的Controller对象。
注意: 该传入的Controller对象必须使用 1中的方式以@Autowired引入,而不可以如下:
mockMvc = MockMvcBuilders.standaloneSetup(new HelloWorldController()).build();
使用上面这种方式,虽然可以得到Controller对象,且其成员函数都可以正常访问,但Controller中以@Autowired引入的各种对象却无法初始化,导致这些对象的值为null。
最典型的就是Service。Controller通常并不会承担过多的逻辑,而是将其交给Service,于是在Controller中往往会以@Autowired的形式引入Service。然而,若使用上面new的方式来创建Mock对象,会导致Controller中引入的Service对象无法注入,从而为null。执行测试,控制台会报空指针错误。
- 创建请求
RequestBuilder request = MockMvcRequestBuilders.get("/HelloWorld")
        .contentType(MediaType.APPLICATION_JSON)    //发送所用的数据格式
        .accept(MediaType.APPLICATION_JSON) //接收所使用的数据格式
        .param("id","201801");  //附加参数
调用的请求为get,同时传入接口名。
- 可以将
get换为post,或者其他请求方式。 contentType和accept定义了发送和接收用的数据格式,这里设置为JSON。param用于附加1个参数,每多1个参数,都可以多调用一次param来附加。无论是get还是post,都可以使用param来附加参数。附加后的参数会填充到请求的parameters字段中。
- 执行请求
ResultActions result = mockMvc.perform(request);
ResultActions一共有3个接口:
public interface ResultActions {
    ResultActions andExpect(ResultMatcher var1) throws Exception;

    ResultActions andDo(ResultHandler var1) throws Exception;

    MvcResult andReturn();
}
- andExpect():用于测试是否为期望值。
- andDo():用于执行某个指定的操作。
- andReturn():用于返回执行结果,为MvcResul类型。
- 分析结果
MvcResult mvcResult = result.andExpect(MockMvcResultMatchers.status().isOk()) // 执行状态
                    .andExpect(MockMvcResultMatchers.jsonPath("name").value("Tesla")) // 期望值
                    .andDo(MockMvcResultHandlers.print()) // 打印
                    .andReturn();   // 返回
可以看到分析结果使用了4中ResultActions的函数。
其中使用MockMvcResultMatchers.jsonPath()可以获取到一个JsonPathResultMatchers,可以用于判断request请求的返回值是否符合期望。
若要自行解析返回结果,则可以:
String resultStr = mvcResult.getResponse().getContentAsString();
然后将resultStr转为JSON即可。
总结
实际测试过程中,往往是Assert.seertThath()与Mock配合使用。
本文由 创作,采用 知识共享署名4.0 国际许可协议进行许可。本站文章除注明转载/出处外,均为本站原创或翻译,转载前请务必署名。最后编辑时间为: 2020/05/16 14:09